 GIF
GIF vs. Animated WebP: When to Convert
Try animated WebP when the destination accepts it and the GIF is larger than you want. The comparison is most useful on your own website, where you can test both files in the same layout. For an emoji upload or a social post, check the accepted format first. A smaller file helps only if the person or application receiving it can play the animation.
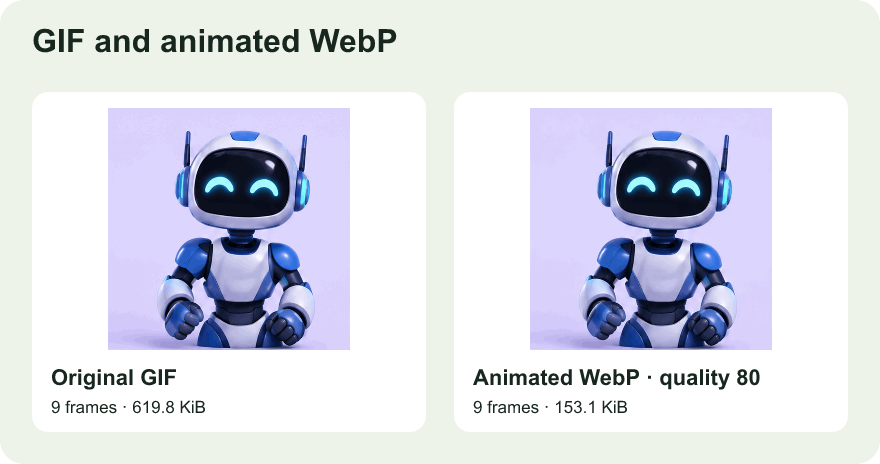
Choose one animation for the comparison
Keep your original GIF. If it includes an idle opening or extra margins, make those edits before comparing formats. Use GIF Trimmer to select the useful passage and GIF Cropper to frame the subject. If you compare a trimmed WebP with a long GIF, the size difference reflects the duration change as well as the format. Use the same edited source for the GIF and WebP candidates to see which encoding works better.
Write down the source dimensions, frame count, playback time, and file size. Choose a few features to inspect in the result, such as fine text, a soft shadow, or the expression on a face. For a site animation, look at the asset at its display size. A detail that is visible at full resolution may be irrelevant in a small card, while text can become unreadable if its edges blur even slightly.
Export a baseline WebP and a second candidate
Open the edited GIF in GIF to WebP. Start with a quality setting toward the higher end of the control, then export and note the actual file size. Try a lower setting with the same input, preview both outputs, and keep the smallest file whose appearance you are happy with. The quality number is an encoder setting rather than a size target. A single setting can yield very different sizes across two animations.
Make a comparable GIF export with GIF Compressor if you intend to compare optimized outputs. For simple artwork, reducing colors may give a reasonably small GIF. For an animation with gradients, the WebP may preserve smoother changes at a similar or smaller size. Some already optimized GIFs can remain competitive. Compare the measured downloads instead of assuming that a newer format will always win.
When the larger export is only slightly sharper, compare at the size the visitor will actually see. For a tiny preview image, keep the file that makes the motion and outline clear. For a full-width walkthrough, protect any interface labels that the viewer has to read. If neither format looks clear at the chosen dimensions, revisit the crop and give the important area a larger share of the canvas.
Check animation, transparency, and rendering
Watch both exports through several loops. Note whether the movement starts and finishes in the expected place and whether any pause feels different. Inspect transparent edges on the backgrounds you use in the actual layout, such as white and dark gray. A light edge that disappears on the editor's background may stand out on a dark theme. Test a transparent animation over its real destination background before replacing the source.
If the animation appears still after upload, check the resulting file in the destination instead of relying on the local preview. A service may make a still thumbnail, re-encode the file, or reject animated WebP while accepting still WebP. Verify the actual animation surface where people will see it. Renaming the extension does not change the format. Keep a GIF version when the receiving application specifically asks for one.
When the result is for your own website
Put both candidates in the layout where the asset will be used. Check that the intended crop and dimensions match the surrounding content. Run a comparison on a phone and a desktop, and use the browser network panel to confirm which file is loaded. If you provide a fallback, verify that the browser requests the appropriate asset and that it occupies the same space. Include a meaningful text alternative when the animation explains a step or conveys information.
Decide how much the reduction matters. Saving a large amount on a frequently loaded animation can be worthwhile. Saving only a few bytes on a rarely seen image may not justify managing two files. For a clip that is almost a still image, consider whether a single frame can do the job. Use the frame extractor to try a still PNG, then choose the moving or still version based on what the reader needs.
Keep the comparison reproducible
Name your outputs so you know which settings made each one. Record the destination, original size, output size, quality or palette setting, and whether the result played where you tested it. Keep one working copy from before the final encoding so a future size change can start there. If you later need a stricter target, revisit the crop or duration before repeatedly converting an already compressed output. That gives you more control over the final quality and makes the tradeoff easier to repeat on another file.